4 tips for drum recording
As drum recording is one of my most dearest topics, I want to help you improve the sound of your drums. The importance of the drum sound is one of the biggest factors that can either make or break an album. Not many drummers are satisfied with how their drums sound after mixing. All the years you spent on developing the groove along with all the money you spent on the drums and drum heads most of the time does not translate from the final mix. I will give you 4 tips for drum recording so that you can start improving your drum sound.
4 tips for drum recording
I have gathered 4 tips that you can use to improve the quality of your drum recording. Drum set is usully the only acoustic instrument in rock and metal genre bands. Bass, guitar and vocals are mostly captured using just one microphone. Drums on the other hand benefit from having more mics making them the instrument that is a lot more challenging to record properly.
Let’s go through my four easy tips and too you can start enjoying improved drum sound on your recordings.
1. Fix the sound source
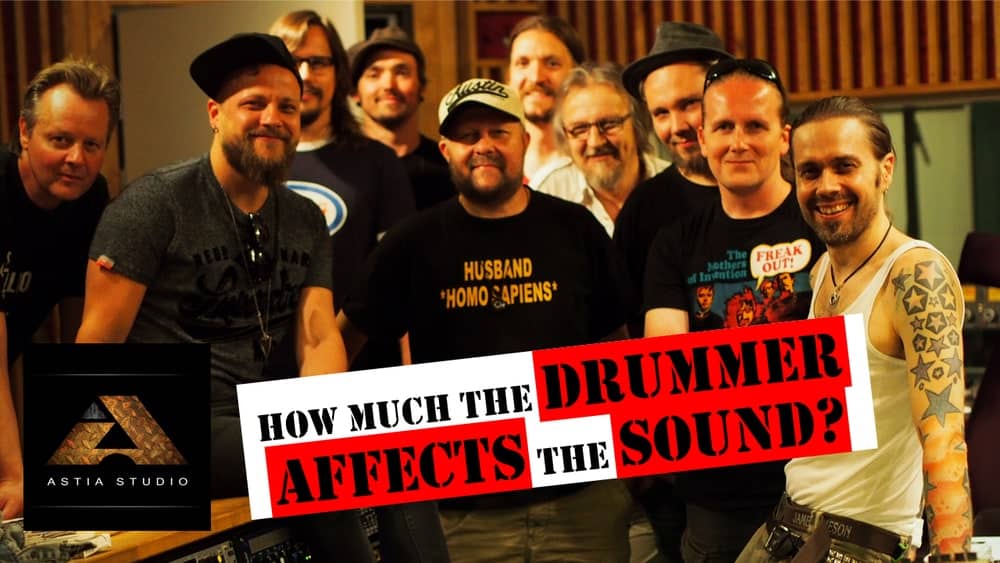
The sound source is one of the keys to a succesfull recording when it comes to all instruments and drums especially. The better your drums sound, the smaller the possibility of failure. An awesome drummer can make a bad sounding drum kit sound good, so it all comes down to the drummer and how he hits the drums. The importance of the musician is demonstrated on my How Much The Drummer Affects The Sound video here.
Out of the blue comes my first example as it’s not about drums at all, yet describes the situation perfectly. I was mixing files that a band had brought and was amazed by the strange guitar sound. It was like the guitar was coming from the room next to us. I mean literally. There was no high frequencies at all and it was like someone had stacked 10 thick blankets over the amp. The guitar player explained that during recording he had turned the treble and middle from the amp to zero and cranked the low frequencies to maximum.
As there was no logical explanation to his actions I figured it was due to the fact that I could write about it on this blog post. The lesson here is that you definitely should not record a certain sound and then during mixing demand the opposite. The guitar player wanted to have a bright metal guitar sound and there was no way to make it happen from what they had recorded. Opposite to what people think, most part of the sound is decided during recording not at mixing. So make the recording count and record the sound that is as close to the final mix as possible!
Tune the drums so that they sound good in the recording room. Use new drum heads as they are brighter than the old. Darker sound usually isn’t what you are after. It’s better to use more time before you start recording rather than record something and then pray for a miracle during mixing.
2. Play the drum set in balance
A thing that doesn’t get enough attention is to play the drum set in balance. It’s nice to really whack those cymbals, yet buying new to replace the broken ones might not be the best way to spend your salary. What if you’d hit those cymbals a bit more quiet to improve the balance of your drum set? This will also be a great financial decision as you don’t have to replace cymbals that often. Hi-hat especially is something you should consider playing not too loud. Pay attention to the balance, of both the drum set and check book, and that will lead to an improved result.
The rimshot hit on snare is highly recommended. Your snare will sound more like the snare on the good sounding albums and you might be able to lure the mixing engineer to ditch the samples and choose the organic option. This will translate your touch, style and the drum set a lot better.
In rock and metal the bass drum sound rarely benefits from a thick coated batter head. A thin clear head such as a double ply Remo Emperor won’t last for months, but sounds awesome when you record it. The beater, no no not the drummer but the bass drum beater, you should turn 90 degrees and use the plastic part instead of the felt. This I came up with Jaska Raatikainen (Children Of Bodom) by accident and we both have been using it ever since. You should test a wooden beater in rehearsal room to see how it feels. A wooden beater is more heavy when it comes to weight and takes time to get used to especially when you play fast bass drum patterns.
Have you already read: 5 Things You Didn’t Know About Children Of Bodom’s Something Wild Album
3. The distance from the overhead mics to snare
For almost two decades I recorded each cymbal using spot-miking; each cymbal had its own microphone. The more mics you use, the bigger the possibility of the phase cancellation and under normal circumstances you don’t want that. I went back to using two overhead mics to capture the cymbals and/or the kit and this gets my warm recommendation. Nowadays the only cymbal spot-mic I use is on hi-hat. Once the drummer plays his kit in balance you don’t need more mics for cymbals. Less microphones = less problems.
There’s an important thing that most recording engineers seem to ignore; the distance between snare and overhead microphones. When it comes to sound use your ears instead of eyes. When placing the overhead mics symmetrically, you’ll be rewarded with a snare that suffers from the phase cancellation. Sure you can move the tracks around in DAW as much as you like, but I recommend staying as far from such activity as possible.
I measure the distance using a hi-tech system that involves a drummer and a mic cable. I hand one end of the cable to the drummer and ask to hold it in the center of the snare head. I’ll carefully measure the distance between the overhead mics with the other end of the cable and adjust the mics until the distance is equal. This way once you pan the overheads the snare has no phase cancellation. I do this on every session and it get my highest recommendation for every drum recording situation.
4. The room microphones
When recording drums in an acoustically treated rehearsal room, use caution with the room microphones. Back in the days when I still accepted files for mixing, I very very very very very rarely ended up using the drum room tracks as they were useless. When the room is too small can you open the door to the corridoor and place the room mics there? When the corridoor isn’t an option and the room sound is next to none, it’s better to ditch the idea of having room mics.
If the room has a reverb that could improve the drum sound, place the room mics with care. Unfortunately most engineers place the room mics few meters away pointing the drums. I tend to do as Mr Steve Albini; when capturing the drum room do not place the mics pointing towards the drums. Facing them towards the drum set causes phase cancellation and that is something you under normal circumstances do not want to have. A much better result comes when you point the room mics to and as close to the wall as possible. This makes the drums sound awesome especially when the room has a nice natural reverb. Let’s dive into another important ingredient; the Haas effect on another blog post a bit later.
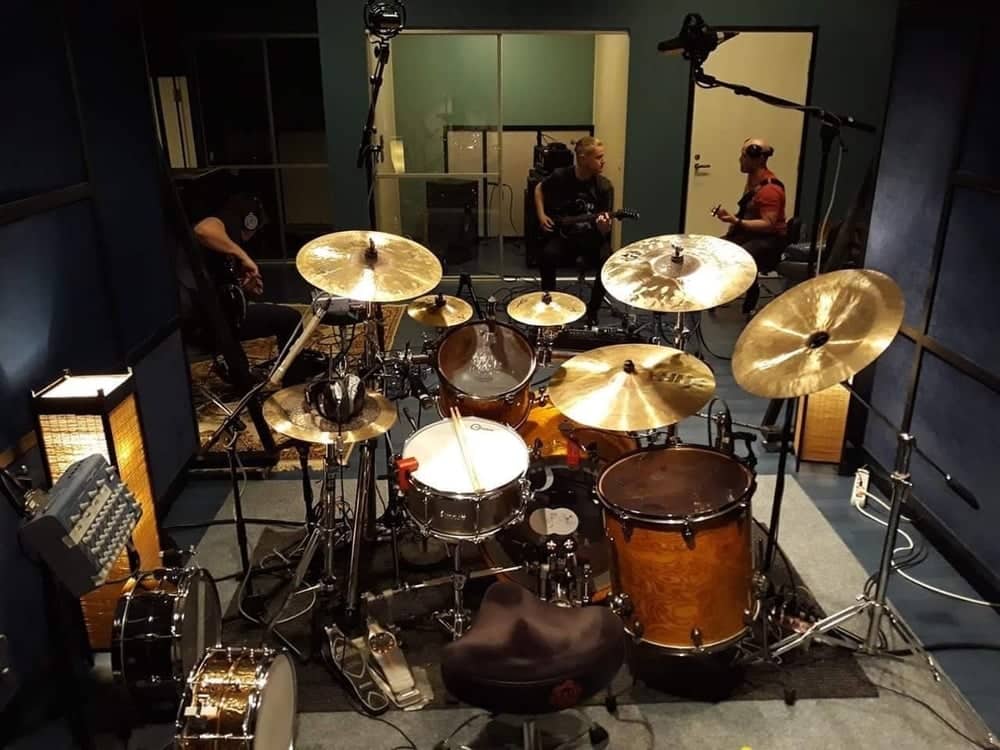
I made a drum room demonstration where you’ll gain a better understanding how drums sound with and without the room tracks. My goal is to show you how much a great sounding room affects the drum sound. I hope you will find insteresting how Ville Aulaskoski (Nato Rock Band), Richard Hiles (Skaahaus), Toni Paananen (session drummer), Janne Parviainen (Ensiferum) and Heikki Saari (Whorion, Finntroll, ex-Norther) sound in our studio A with and without the room tracks.
Let’s recap my 4 tips for drum recording:
1. Fix the sound source
2. Play the drum set in balance
3. The distance from the overhead mics to snare must be qual
4. The room microphones in a good sounding room facing the wall
Successfull drum recording
Thank you for reading 4 tips for drum recording. I feel privileged to share my quarter of a century of recording experience on this beloved topic so that you can improve your drum sound.
If this post was helpful, please share it on social media. This way you will help your friends to benefit from the information.
I cannot wait to reply your questions and comments so please do leave them below. To experience your drums recorded in great detail contact me privately by clicking here. Thank you very much and all the very best!
Astia-studio is a full analog recording studio located in eastern Finland with 25 years of experience. Bands and artists from all over the world including USA and the furthest corner of Russia, Vladivostok have arrived to us for tape recording sessions.


11/05/2019 @ 2:43 pm
Excellent penmanship and conceptual discourse. One day I want to record at least one guitar track in your studio as I’m only a guitar playing enthusiast.
11/05/2019 @ 2:54 pm
Thank you very much Edward. You are warmly welcome. ? I can guarantee a very pleasant surprise especially with what the tape recording translates even when listening the result from a poor quality mp3. ?⭐️
26/05/2019 @ 7:21 am
Anssi you are my héroe since I was a child, I hope some day I can record an álbum in your studio, cheers from Chile
26/05/2019 @ 9:40 am
Dear Rodrigo, thank you very much for the kind and heart-warming comment. You are very welcome to make an album with me here at Astia-studio. I wish you all the very best! ??⭐️
11/05/2019 @ 5:56 pm
Sound engineers with whom I work do not like rim shots. “This snare becomes uncontrollable and strongly sticking out ..” ?
Very cool Anssi!
Thank you!
11/05/2019 @ 6:10 pm
Thank you very much for the comment Artem. I personally would stay away from such engineers. I love how rim shots sound and recommend them to most rock and metal drummers. ??
15/08/2019 @ 8:57 am
Hello anssi sir ! I am follow your studio since 5 year. And i have one wish i want to record the drumming sound in your studio.I hope my wish is complete soon.
15/08/2019 @ 10:00 am
Hi and thanks for the comment. You are warmly welcome to record your drumming on tape with me here at Astia-studio. All the very best! ??
16/02/2020 @ 5:47 pm
Hi how are you?
Can I translate your article
“tips for drum recording”
on the site “https://astiastudio.fi/4-tips-for-drum-recording/ ” ?
To be published in the Journal of the Audio and Video Industry
16/02/2020 @ 8:47 pm
Hi Elahe and thank you for the comment. I hope you too are doing great. I’m very good, thanks. Just completed another awesome tape recording session in studio A. Sure, no problem. Please do translate my article and include the link to the original post. ?
Have a great week and all the very best! ?
17/02/2020 @ 8:47 am
Thanks
Yes, Sure
have a good week ??
02/04/2020 @ 8:36 pm
Hello anssi sir ?
I hope you are fine
The translation of the article will be sent to you,
Thank you for your efforts 🙂 ?
03/04/2020 @ 10:27 am
Dear Elahe, thank you very much for taking the time to do the translation. I highly appreciate. ? Stay healthy and stay safe. All the very best! ?⭐️
02/04/2020 @ 8:39 pm
4 نکته برای ضبط صدای درامز
از آنجا که ضبط صدای درامز یکی از جذابترین موضوعات برای من است، میخواهم به شما کمک کنم صدای درامز خود را بهبود بخشید. اهمیت صدای درامز یکی از بزرگترین عواملی است که میتواند باعث موفقیت یا شکست یک آلبوم شود. بسیاری از درامرها از صدای ساز خود پس از میکس راضی نیستند. همهی سالهایی که صرف پرورش نواختن و پولی که صرف خرید درامز و پوست درامزهای خود کردهاید، در اکثر اوقات در میکس نهایی رضایتبخش نیستند. من چهار نکته را برای ضبط صدای درامز به شما میگویم تا بتوانید بهبود صدای درامز خود را آغاز کنید.
4 نکته برای ضبط صدای درامز
من 4 نکته را گردآوری کردهام که میتوانید از آنها برای بهبود کیفیت ضبط صدای درامز خود استفاده کنید. درامز معمولا تنها ساز آکوستیک در ژانر راک و متال است. صداهای باس، گیتار و آوازها عمدتا تنها با استفاده از یک میکروفون گرفته میشوند. از سوی دیگر، درامز به میکروفونهای بیشتری نیاز دارد که آن را به ساز پر چالشتری برای ضبط مناسب صدایش تبدیل میکند.
اجازه دهید به این 4 نکته آسان بپردازیم تا شما بتوانید از صدای بهینه درامز خود در ضبط کارهای خود لذت ببرید.
1. صدا را از منبع آن تصحیح کنید
منبع صدا یکی از کلیدهای ضبط موفق در زمانی است که انواع آلات موسیقی و درامز استفاده میشوند. هر چه صدای درامز بهتر باشد، احتمال ناکامی کمتر میگردد. نوازنده بد میتواند باعث بد شدن صدای درامز در میان صداهای خوب دیگر شود لذا این بستگی به نوازنده و نحوهی نواختن او دارد. اهمیت این موضوع برای موسیقیدانها در اثر من به نام «درامر چقدر بر صدای ویدئو اثرگذار است» به اثبات رسیده است. بلافاصله اولین مثالم را ذکر میکنم که اصلا دربارهی درامز نیست اما وضعیت را به دقت توصیف میکند. من در حال میکس کردن فایلهایی بودم که یک گروه برای من آورده بود و با تعجب صدای عجیب گیتاری را در آن شنیدم. مانند این بود که گیتار را از اتاق کناری برای ما بنوازند. واقعا منظورم همین است. هیچ فرکانس بالایی وجود نداشت و مانند این بود کسی که 10 پتوی ضخیم روی آمپلیفایر انداخته است. نوازنده گیتار توضیح داد که در طول ضبط، او تریبل و مید را روی تقویتکننده صفر کرده و باس را حداکثر!
از آنجا که هیچ توضیح منطقی برای کار او وجود نداشت، تصمیم گرفتم این موضوع را در این پست وبلاگی بنویسم. درسی که میتوان در اینجا فرا گرفت آن است که شما نباید به هیچ وجه یک صدای مشخص را ضبط کنید و سپس در طول میکس، تقاضای حالت بر عکس آن وجود داشته باشد. نوازنده گیتار خواهان صدای شفاف گیتار متال بود ولی هیچ روشی برای عملی ساختن این کار از آنچه که ضبط شده بود، وجود نداشت. بر خلاف آنچه مردم فکر میکنند، بخش اعظم صدا در طول ضبط تعیین میشود نه در هنگام میکس کردن. بنابراین، با دقت ضبط کنید و صدایی را ضبط نمایید که تا حد امکان نزدیک به صدای نهایی است!
درامز را به گونهای تنظیم کنید که صدای خوبی در اتاق ضبط داشته باشد. از پوستهای نو استفاده کنید زیرا صدای آنها شفافتر از پوستهای کهنه است. صدای کدر معمولا چیزی نیست که شما به دنبال آن باشید. بهتر است قبل از آغاز ضبط وقت بیشتری صرف کنید نه این که چیزی را ضبط کنید و بعد انتظار معجزه در طول میکس داشته باشید.
2. درامز را به صورت متوازن بنوازید
موضوعی که توجه کافی به آن نمیشود توازن درامز است. خوب است که صدای سنج را درآورید اما خرید سنجهای جدید برای جایگزین کردن سنجهای شکسته ممکن است بهترین راه برای صرف حقوقتان نباشد. چگونه خواهد بود اگر آرامتر به این سنجها ضربه بزنید و توازن کار بهتر کنید؟ این یک تصمیم بزرگ مالی نیز هست زیرا مجبور نیستید سنجها را تعویض کنید. مشخصا باید به این موضوع توجه کنید که نواختن با صدای بلند را در نظر نگیرید. به توازن هم در ساز و هم در حساب بانکی خود توجه کنید و خواهید دید که این موضوع منجر به نتیجهای بهینه خواهد شد.
ضربههای ریم شات روی اسنیر خوب صدا میدهند. در اینصورت اسنیر شما میتواند صدایی به خوبی صدای موجود آلبومهای خوب داشته باشد و همچنین سبب میشود تا مهندس میکستان را ترغیب کنید تا جایگزینی صدای اسنیر با سمپل را رها کرده و از صدای اصلی شما استفاده کند. این باعث بهتر ارایه شدن ضرب دست، سبک و صدای ساز شما میشود.
در موسیقی راک و متال، صدای مناسب کیک درام از پوست ضخیم روکشدار به دست نمیآید. پوست نازک مانند مدل دولایهی Remo Emperor چند ماه بیشتر دوام نمیآورد اما به هنگام ضبط صدای بینظیری دارد. سر پدال را هم 90 درجه بچرخانید و از بخش پلاستیکی به جای بخش نمدی آن استفاده کنید. من بهصورت اتفاقی در آلبوم بچههای بودوم به این موضوع رسیدم و الان همیشه از آن استفاده میکنم. باید از بخش چوبی سر پدال نیز در اتاق تمرین استفاده کنید تا ببینید چه حسی دارد. سر چوبی سنگینتر است و باید زمان زیادی برای عادت به آن صرف کنید به ویژه وقتی که ریتمهای سریع را با کیک درام مینوازید.
3. فاصله از میکروفونهای بالاسری تا اسنیر
برای تقریبا دو دهه، من صدای هر سنج را با میکروفون نزدیک خودش ضبط میکردم. هر چه از میکروفونهای بیشتری استفاده کنید، احتمال بیشتری دارد که باعث تداخل فازی شوید و این معمولا چیز جالبی نیست. من به استفاده از یک جفت میکروفون بالاسری بازگشتم تا صدای تمام سنجها یا حتی مجموعه ساز درامز را بگیرم و به همین دلیل آن را به شما هم توصیه میکنم. امروزه تنها برای های هت از میکروفون نزدیک استفاده میکنم. وقتی نوازنده به طور متوازن مینوازد، به میکروفونهای بیشتری برای سنجها نیاز نیست. میکروفون کمتر = مشکلات کمتر.
یک نکته مهم وجود دارد که اکثر صدابرداران آن را نادیده میگیرند؛ فاصلهی میان اسنیر و میکروفونهای بالاسری. وقتی موضوع صدا مطرح است، از گوشهای خود با جای چشمانتان استفاده کنید. وقتی میکروفونهای بالاسری را بهصورت متقارن قرار میدهید، باعث میشود که شاهد تداخل فاز در اسنیر باشید. با وجود آنکه برای حل این مشکل میتوانید ترکها را آنگونه که میخواهید در DAW در زمان کمی جابجا کنید اما توصیه میکنم تا حد امکان از این کار حذر نمایید.
من این فاصله را با یک سیستم بسیار پیشرفته!! متشکل از نوازنده و یک کابل اندازهگیری میکنم!. یک سر کابل را به درامر میدهم تا آن را در وسط اسنیر نگه دارد. من با دقت فاصله میان میکروفنهای بالاسری و انتهای دیگر کابل را اندازهگیری و میکروفونها را تنظیم میکنم تا فاصلهها یکسان شود. این کار باعث میشود وقتی اسنیر را مینوازید، هیچگونه تداخل فازی رخ ندهد. من همیشه این کار را انجام میدهم و مهمترین توصیهام برای هر مرتبه ضبط صدای درامز است.
4. میکروفونهای اتاق
به هنگام ضبط صدای درامز در یک اتاق تمرین آکوستیک، با احتیاط از میکروفونهای اتاق استفاده نمایید. وقتی به روزهایی بازمیگردم که هنوز فایلها را برای میکس قبول میکردم، خیلی خیلی خیلی خیلی خیلی به ندرت از ترکهای اتاق درامز استفاده میکردم زیرا معمولا بلا استفاده بودند. وقتی اتاق خیلی کوچک است، آیا میتوانید در را به راهرو باز کنید و میکروفون اتاق را آنجا قرار دهید؟ وقتی راهرو وجود ندارد و صدای اتاق تقریبا هیچ است، بهتر ایده استفاده از میکروفونهای اتاق را کنار بگذارید.
اگر اتاق دارای ریورب است که میتواند صدای درامز را بهبود ببخشد، با دقت از میکروفنهای اتاق استفاده کنید. متاسفانه، اکثر صدابرداران آنها را در فاصله چندمتری و بهسوی درامز قرار میدهند. میخواهم نظر آقای استیو آلبینی را برای شما بگویم؛ به هنگام استفاده از میکروفونهای اتاق برای درامز، میکروفونها را به سمت درامز قرار ندهید. این کار باعث تداخل فازی شده و شرایطی را به وجود میآورد که معمولا نمیخواهید. نتیجه بهتر زمانی حاصل میشود که میکروفونهای اتاق را تا حد امکان به طرف و در نزدیکی دیوار قرار میدهید. این باعث صدای پر ابهت درامز به ویژه زمانی میشود که اتاق ریورب طبیعی خوبی دارد.
اجازه دهید عناوین چهار نکته ضبط صدای درامز را مجددا بیان کنم:
1. صدا را از منبع آن تصحیح کنید
2. درامز را بهصورت متوازن بنوازید
3. فاصله از میکروفونهای بالاسری تا اسنیر باید یکسان باشد
4. میکروفونهای اتاق در یک اتاق ضبط خوب باید رو به دیوار باشند
ضبط موفق صدای درامز
با تشکر از خواندن 4 نکته ضبط صدای درامز. احساس خوشحالی میکنم که یک ربع قرن تجربیاتم در زمینه ضبط را درخصوص موضوعی که عاشق آن هستم در اختیار شما قرار دادم لذا میتوانید صدای درامز خود را بهبود بخشید.